Cacao & avocado shakes

It’s that time of year again when my parents avocado trees are dripping with fruit and the local markets are full of gorgeous avo’s ready for the picking. I’ve been filling my bag with them at the markets, for a very decent price, and I can’t wait for my parents visits when (hopefully) they come with arms full of them. Of course, nothing beats the simple avo on toast combination , and I can’t go past that. But when I have so many I look to other ways of including them in my diet. Smoothies are one of my favourite things and I don’t think a day goes by when I don’t have one. So it’s no wonder that the avo’s have ended up in my smoothies. They are perfect in a vibrant green smoothie, with lots of kale, mint, lemon and cucumber, adding a very welcome creamy texture.

Today I mixed it up with a very decadent shake, using the avocado to make the drink extra thick and creamy. This is the perfect breakfast treat or dessert. It’s packed with the goodness of raw cacao for that rich chocolate flavour, mesquite adds a lovely hint of caramel and is a good source of calcium & potassium as well as stabilising blood sugar levels and of course the hero avocado is high in vitamin K and healthy monounsaturated fats.

Cacao & avocado shakes 

Serves 2

Ingredients 

  • 1 large frozen banana
  • 1/2 large avocado
  • 2 ice cubes
  • 2 sprigs of mint
  • 2 tbsp cacao powder
  • 2 tsp mesquite powder
  • 2 tsp almond butter
  • 2 medjool dates, pitted
  • 2.5 C unsweetend almond milk

Method

Place the banana, avocado flesh, ice, mint cacao powder, mesquite powder, medjool dates & almond milk into a high speed blender. Blend for 1 minute or until thick & creamy. Pour into 2 glasses and top with an extra sprinkle of cacao & a few cacao nibs. Drink immediately.

Vanilla cream cake with seasonal fruit

OLYMPUS DIGITAL CAMERA

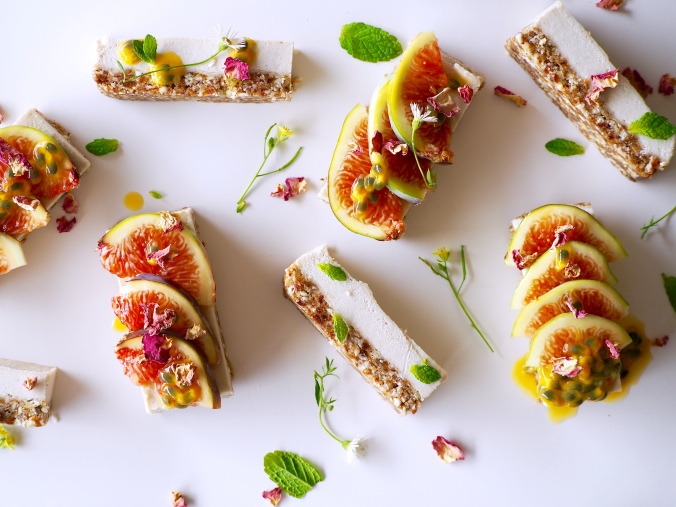
This may sound like a totally indulgent and luxurious dessert but really its not so bad for you at all! The ‘cream’ filling is made from raw cashews and coconut milk which is fluffy and flavoursome and so much better for you than a regular cream filling! Along with a nut base and fresh seasonal fruit on the top it’s the perfect guilt-free treat. My mum has been going all out and taking a slice for her morning tea at work, piled high with sweet figs and tangy passionfruit it’s the perfect morning indulgence. It would also be beautiful on an afternoon high tea platter.

The cream cake filling is scented with vanilla beans and raw local honey which adds not only sweetness but floral fragrances making it the perfect backdrop for whatever seasonal fruit you have on hand. I have chosen figs and passionfruit as our garden is bursting with them both at this time. Plus, the sweetness from the figs and tang from the passionfruit work beautifully together. I would also say mango and raspberries would be a delicious topping. Strawberries, kiwifruit, peaches and even cherries. Choose whatever fruit you have available in abundance and by doing this you will be getting the tastiest option. Sprinkle a few little mint leaves on top and you have a picture perfect and flavour packed treat!

For the base, I have chosen to use mainly buckwheat groats as these make the dessert a little lighter, there’s only so many nuts we can have, right?! But by including a few walnuts the base still has a delicious nutty flavour and is packed with nutrients.

OLYMPUS DIGITAL CAMERAOLYMPUS DIGITAL CAMERA

Notes about the recipe

I like to make the cream cake and place it sliced in a tupperware in the freezer without adding the topping. This way it will last up to 1 month frozen. Before serving I simply remove the desired amount of slices 30 minutes prior and top with the fresh fruit topping. 

To achieve a really creamy filling it is best to use a high speed blender, such as a vitamix. 

Vanilla & honey cream cake with seasonal fruit 

makes approximately 16 slices

Ingredients

for the base

  • 1/2 C raw walnuts
  • 3/4 C buckwheat groats (buckinis)
  • 1/2 C shredded coconut
  • 8 fresh dates, pitted
  • 4 dried figs
  • 2 tbsp virgin coconut oil
  • a pinch sea salt
  • 1 tsp ground cinnamon

for the cream filling

  • 2 C raw cashews (soaked overnight)
  • 1/2 C full fat coconut milk
  • 2 T raw honey (or maple syrup)
  • 1 tsp vanilla bean powder
  • 2 tbsp coconut oil

for the topping (choose whatever locally grown, seasonal fruit you have available)

  • 1 C sliced fresh figs
  • 4 passionfruit, pulp only
  • a few fresh mint leaves
  • edible flowers to decorate, if desired

Method

  1. Start but soaking your cashews overnight or for at least 6 hours.
  2. For the base, place the walnuts, buckwheat and coconut into a processor and blitz for about 1 minute, or until a rough crumbly textures is achieved. Add the dates, dried figs, coconut oil, sea salt and cinnamon before processing again until a sticky texture.
  3. Press this mixture firmly into a lined 20×30 cm tin. Place into the freezer.
  4. For the cream filling, drain the cashews and place in a high speed blender along with all the other filling ingredients. Blitz for 2-3 minutes or until a VERY creamy texture is achieved. Check the balance of flavours as you may need to add a little more honey if you’ve got a sweet tooth.
  5. Pour the filling over the base and place back into the freezer to set for 4-6 hours. Once completely set slice into 16 bars. If serving now top with fig slices, passionfruit pulp and mint leaves and let sit for 30 minutes to thaw.
  6. Otherwise store the slices in the freezer for up to 1 month.

Enjoy!

Show me your creations by tagging #goodnessgraciouskitchen on Instagram xx


Raw banana crepes

OLYMPUS DIGITAL CAMERA

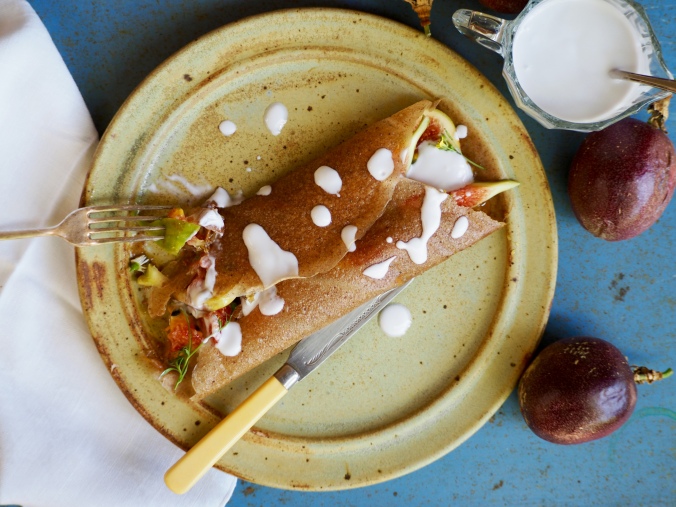
A few weeks ago I had the most divine breakfast at a beautiful cafe in Perth called The little shop of plenty. They had raw banana crepes on the menu and I knew right away i had to taste them! They were nothing like traditional crepes but absolutely delicious in their own way. Since then, I have had them on my mind and when we had some over ripe bananas hanging around I knew the time was perfect. Plus, it was a Saturday night when I started so I couldn’t resist the thought of waking up to a slow Sunday morning with raw banana crepes!

I have flavoured the crepes with a little cinnamon as it always goes so perfectly well with banana and adds another dimension of sweetness. It’s also loaded with antioxidants and anti-innflamatory properties, so win win! We then filled the crepes with beautiful fresh figs and passionfruit from our garden, coconut cream, a little mint and some raw honeycomb my Dad collected from the bees. It was a sensational combination and I urge you to try it! Otherwise the crepes are delicious with whatever seasonal fruit is available or even almond butter and honey. Let you imagination run wild!

OLYMPUS DIGITAL CAMERA

Notes about the recipe 

You will need a dehydrator to make the crepes. I have a large sunbeam one which wasn’t too expensive and does the job well. The time will depend on your dehydrator settings but as stated in the recipe mine took 4.5 hours at 70 degrees celsius.

This isn’t your regular cope so don’t expect anything fluffy and light. Rather these are chewy in texture and really quite filling.

OLYMPUS DIGITAL CAMERA

Raw banana crepes

Serves 3-4  

Ingredients 

  • 4 ripe bananas, peeled
  • 1 tsp ground cinnamon
  • 1 tbs chia sees
  • 1/4 C filtered water
  • To serve: fresh figs, passionfruit, coconut cream, honey comb, mint and edible flowers. Feel free to use any seasonal fruit you have available. 

Method

  1. Place the bananas, cinnamon, chia and water in a high speed blender and pulse until very smooth and creamy.
  2. Pour 1/4 C onto a lined dehydrating tray and move the tray in a circular motion to evenly spread the mixture into a circle. Repeat until all the mixture is used.
  3. Dehydrate at 70 degrees celcius for 4.5 hours, or until dry and not sticky.
  4. Gently peel off the baking paper. The crepes will keep in an airtight container with paper between each one for up to 1 month.
  5. To serve slice the figs and scoop out the passionfruit pulp. Fill the crepes with the figs, passionfruit, a drizzle of coconut cream, a little honeycomb a few mint leave and  edible flowers. Roll up and enjoy the beautiful fresh flavours!

Enjoy! Show me your crepes on Instagram @goodnessgraciouskitchen #goodnessgraciouskitchen


Summer Goddess Salad

OLYMPUS DIGITAL CAMERA

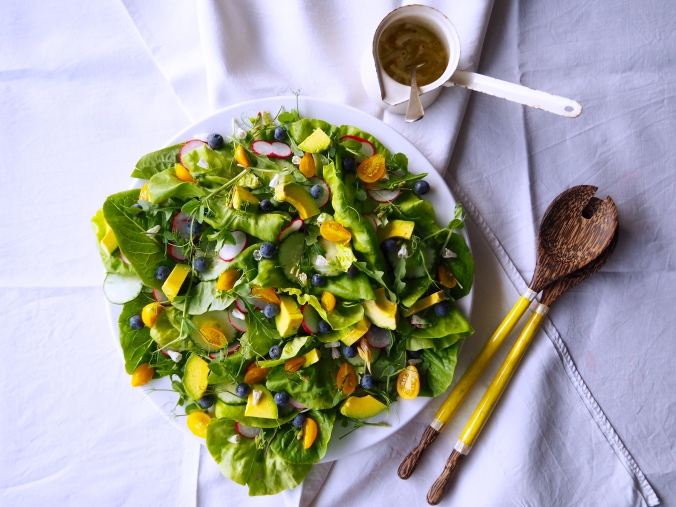
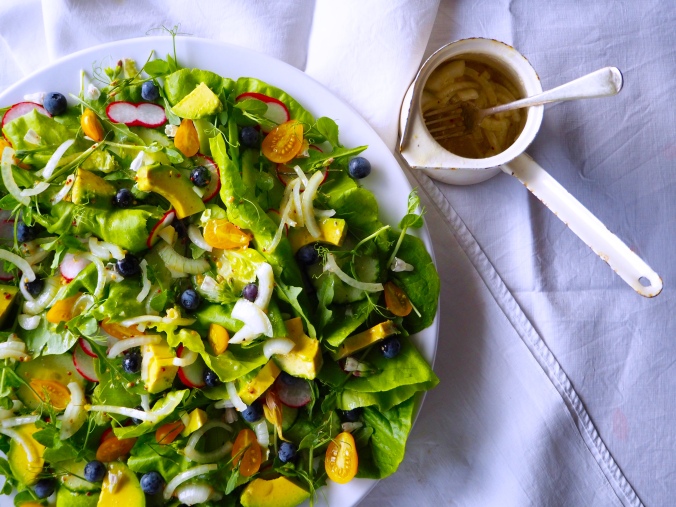
What could possibly be better for you than a huge platter piled high with vibrant green leaves, sprouts, crisp cucumber, sweet sun-ripend tomatoes, creamy avocado, spicy radishes, tangy blueberries and a lemony dressing?! Nothing! It’s time for you to enjoy the best of what summer has to offer, so head to your veggie patch, community garden or local farmers market and find some seasonal greens to whip up this bowl of nourishment. I can’t promise you’ll end up looking like a summer goddess but I can promise you’ll feel like one. And its all about whats on the inside, right?

OLYMPUS DIGITAL CAMERA

Summer Goddess Salad 

Serves 4 as a side

Ingredients 

  • 1 head of butter lettuce
  • 1 head of baby cos lettuce
  • 100g baby rocket
  • 100g pea sprouts
  • 150g yellow pear tomatoes (or cherry tomatoes), halved
  • 50g blueberries
  • 2 radishes, thinly slices
  • 1 avocado, large dice
  • 2 Lebanese cucumbers, sliced
  • edible flowers to garnish (borage, nasturtium, pansy)

Lemony vinaigrette

  • 1/2 white salad onion, thinly sliced
  • 6 Tbsp extra virgin olive oil
  • 1 lemon, juiced
  • 1 tsp wholegrain mustard
  • salt and cracked pepper

Method 

  1. Wash the lettuces together while pulling the leaves off the stem. Then spin dry all the leaves and place wrapped in a tea-towel in the fridge. This ensure beautifully crisp leaves.
  2. Wash the rocket and pea sprouts together, spin dry and place wrapped in a tea-towel in the fridge.
  3. To make the vinaigrette combine the olive oil, lemon juice, mustard and season to taste with salt and pepper. Once mixed add the onion slices and set aside.
  4. To assemble the salad cover a large platter with 3/4 of the lettuce leaves. Pile over the rocket, pea sprouts, cucumber, tomatoes, radishes and avocado. Add in the rest of the lettuce leaves before sprinkling on the blueberries and edible flowers.
  5. Dress the salad just before serving.

OLYMPUS DIGITAL CAMERA


Enjoy!

Show me your salads on Instagram by tagging #summergoddesssalad and #goodnessgraciouskitchen


Almond butter and blueberry smoothies

Right now this is my go-to smoothie combo. If I could, I would have it for breakfast, lunch and dinner. And I just can’t stop raving about it! Apart from telling all my friends various times, I also thought I better not let you beautiful readers down and give you this super quick and luxurious smoothie, so you too can rave about it.

It’s packed with almond butter and chia to make it super thick and creamy while also providing you with a generous dose of good fats and a complete source of protein. Cacao powder adds a rich but subtle chocolate taste while also being a great source of magnesium, calcium, zinc, iron and potassium.  Maca powder is an ancient vegetable that is great for balancing hormones, relieving stress and boosting energy with a delicious malt flavour. It is best to start with a little if you have not had maca before and gradually increase the amount to suit your taste.  These ingredients really make this a super feel good smoothie far any day of the week! Plus blueberries and bananas, could it get any more super?!

Almond butter & Blueberry smoothie

serves 1 hungry soul for breakfast or 2 as a snack

Ingredients

  • 1 C almond milk
  • 3 frozen bananas
  • 1 heaped tbsp almond butter
  • 1 tsp maca powder
  • 1 tsp raw cacao powder
  • 1/2 tsp ground cinnamon
  • 1 tbsp chia seeds
  • 1/2 C fresh blueberries, to serve
  • Dried rose petals, chia, cacao nibs  and almond butter, to serve if desired.

Method

  1. Measure and place all the ingredients, except the blueberries, into the blender in the order listed.
  2. Blend on high for 1 minute or until thick and creamy.
  3. Pour into 1 large bowl or two smaller jars and pop into the freezer for 5 minutes. The chia seeds will gel and make the smoothie extra thick.
  4. Meanwhile wash your blueberries and slice some in half. Prepare any other toppings you wish to include.
  5. Remove the smoothie/s from the freezer and top with the blueberries and (almond butter, chia, rose petals and cacao nibs).
  6. This smoothie needs a spoon!

Enjoy! Show me your smoothies on Instagram #goodnessgraciouskitchen


Espresso Truffles

I have just returned home after a few weeks with my parents in the beautiful South West where I spent most of my time cooking, reading, walking on the beach and playing in the garden. My parents enjoyed many coffee breaks throughout the day and I became quite the barista. Although I don’t drink coffee I enjoy the taste and smell so I put my skills to good use and whipped up these delicious morsels!

Packed full with beneficial fats and minerals such as iron, magnesium and zinc these make the perfect healthy treat. Brazil nuts can of course be substituted with a different nut but I like the flavour and oily (the good kind) texture the brazil nuts give. Maca is a root vegetable from Peru which is high in many vitamins and minerals as well as being a great energy booster. This makes these treats a REAL pick-me-up for when you’re feeling deflated, which to be honest happens to most of us during winter.

Anyway, tomorrow I’m off to the sunny island of Bali to escape the winter chill and hopefully come back bursting with inspiration for new recipes.

Espresso Truffles

Makes ~20 medium sized balls

Ingredients

1/2 C raw brazil nuts

1/4 C desiccated coconut

1/4 C rolled oats

1 tbsp raw cacao powder

1 tbsp raw maca powder

1/2 tsp ground cinnamon

10 fresh medjool dates, pitted

1 shot of strong espresso

2 tbsp extra virgin coconut oil

Method

In a food processor blend the brazil nuts, desiccated coconut and rolled oats until ground. Add the cacao and cinnamon and give it another quick blitz. Then add the dates, espresso and coconut oil processing until all the ingredients come together.

Roll heaped tablespoons of the mixture into balls and place in a tupperware lined with baking paper. Refrigerate for 2 hours before serving. Keep leftovers stored in the fridge for up to 1 week or freeze for 1 month.

Enjoy!

P.S Don’t gobble too many of these before bed time otherwise you might have a sleepless night like I did!

P.P.S This post was meant to be published before my tropical holiday however I had technical difficulties! I am now back after a week of glorious sunshine and will have some Indonesian inspired recipes for you all very soon. X


Breakfast in a jar

Processed with VSCOcam with f2 preset

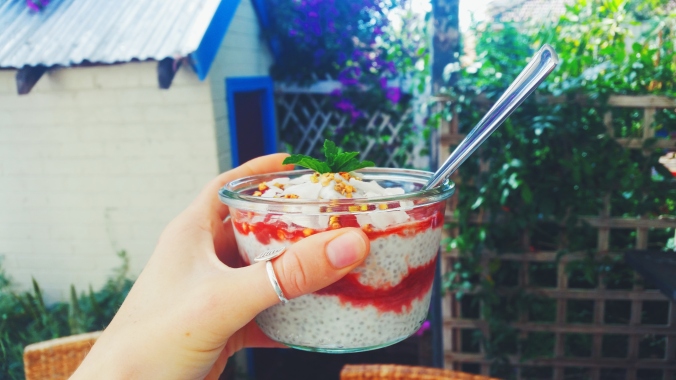
As you may know by now, I love a delicious breakfast that can be prepared the night before! When I have to rush to work I like being able to grab my breakfast jar as I head out the door, knowing it will fill me up until lunch time. This breakfast in a jar is no exception. With creamy chia, slightly tart rhubarb and crunchy sweet buckinis it will satisfy all your cravings and you won’t be tempted by a pastry or muffin.

I also love how easy this is to prepare at night. It’s really just a matter of mixing it all up, and if you wish making enough to last a few breakfasts.

Chia seeds are the highest plant source of omega 3, fibre and protein as well as boasting a range of vitamins and minerals. It’s a great vegan protein source as it contains all 9 essential amino acids. Chia will help you have luscious hair, glowing skin and strong nails.

I like to serve my chia with a tart rhubarb compote, its easy to make and delicious. Just slice 4 stalks of rhubarb into 1 inch size pieces and combine in a pan with the juice of 1 lemon, 2 T coconut sugar, the seeds of a vanilla pod and a little fresh ginger. Cook over low for 5-10 minutes, until just soft. Refrigerate until required.

Processed with VSCOcam with f2 preset

Chia and rhubarb parfait

Serves two

4 T chia seeds

1 C coconut milk

1/2 C coconut water or filtered water

Seeds from a vanilla pod or 1 t vanilla bean extract

1/2 C Rhubarb compote

2 T buckinis

1 t bee pollen

1 T coconut flakes

Method

Combine the chia, coconut milk, coconut water and vanilla in a bowl. Cover and refrigerate overnight.

In the morning spoon out half and layer in a jar with the rhubarb, buck inis, bee pollen and coconut flakes.

Processed with VSCOcam with f2 preset

Enjoy!

Raw cacao and mint slice

Processed with VSCOcam with hb1 preset

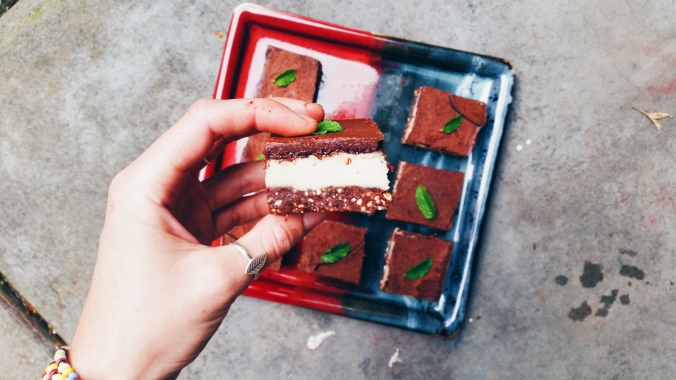
I first made this slice about six months ago and one of my friends tasted it and fell in love! Ever since then she has been begging me to get the recipe on the blog. So finally I am sharing with you a gorgeous healthy raw slice recipe based on the very unhealthy choc mint slice biscuits.

Chocolate and mint are one of my favourite flavour combinations. The richness of the chocolate goes beautifully with refreshing mint. I love anything with these flavours and this slice is no exception. The base is sweet, crunchy and chewy, the filling so creamy and minty and the chocolate on top is bittersweet.  It’s a lovely raw treat to enjoy any time of the day.

Cacao is pure and unprocessed meaning it retains all the natural vitamins and minerals.  It’s also full of antioxidants and feel good endorphins. Mint aids digestion so it’s great to have after dinner!

Processed with VSCOcam with f2 preset

Raw cacao and mint slice

Base

1/2 C plain buckinis

1 C pecans

1/4 C cacao powder

1 T coconut oil

1 C fresh dates

Filling

1 1/4 C cashews, soaked overnight

1/2 C coconut oil

1/4 C pure maple syrup

1/4 C coconut butter

2 t peppermint essential oil

Chocolate top

1/2 C cacao powder

1/2 C coconut oil

1/2 C maple syrup

Method

Line a lamigton tin (20×30) with baking paper. Process the activated buckinis and pecans until a rough crumb. Add the rest of the base ingredients and process until sticking together, you may need to add a couple of teaspoons of water. Press into the lined tin and place in the freezer.

For the filling, place everything into a high-speed blender and blend until lovely and creamy. Spoon over the base and tap on the bench to achieve a smooth even finish. Place back into the freezer.

For the chocolate top, place all the ingredients into a heat proof bowl. Place this bowl over a bowl of boiling water and stir until all melted and combined. Pour this over the other two layers and freeze for at least 4 hours.

Take out of the freezer and slice into approx 15 squares. I like to keep it all in the freezer and take out a slice 5-10 minutes before eating.

Processed with VSCOcam with f2 preset

Enjoy!

Coconut bircher

Processed with VSCOcam with f2 preset

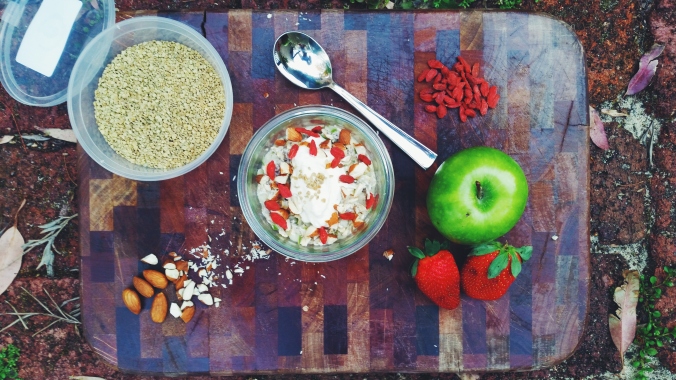
Bircher muesli is one of those fabulous breakfasts that you can throw together the night before and then its there for you to grab as you race out the door in the morning. I am sometimes rushing off and just pop my jar of bircher in my bag to enjoy when I get to work. Otherwise, I’ll happily eat it at home after a run, thankful for a relaxing morning with no breakfast mess!

I have tried many different versions of bircher but this would have to be my favourite by far. I found that if I used nut milk or yoghurt the result was rather dense whereas the coconut water gives a lovely light texture and refreshing flavour.

I have used rolled oats but they could easily be swapped for quinoa flakes. The toppings are really whatever you fancy on the day and I like to change them up to keep it exciting. Coconut yoghurt or greek yoghurt is always nice as well as some crunchy nuts and something sweet. Fresh fruit is also a delicious addition.

Processed with VSCOcam with f2 preset

Coconut bircher muesli 

Serves 2-3

Ingredients

1 C rolled oats

2 T chia seeds

1/2 C desiccated coconut

1 small granny smith apple, grated

2 t cinnamon

1 1/2 C coconut water

Toppings

2 T coconut yoghurt

1 T raw almonds, chopped

1 T goji berries

1 t bee pollen

Method

Place all the dry ingredients in a bowl and give a quick stir. Add the apple and coconut water and combine well. Cover, place in the fridge and let set overnight.

In the morning take out the bircher, give and stir and then serve your desired amount. Top with coconut yoghurt, almonds, goji berries and bee pollen.

Enjoy!

Mixed berry and caramel cake

Processed with VSCOcam with f2 preset

I am now living back in Western Australia and have enjoyed the end of a wet winter and the start of spring. Between all the unpacking, catching up with friends and finding a job I have sadly not had time to update this blog. But I am back now, with a recipe you wont want to miss!

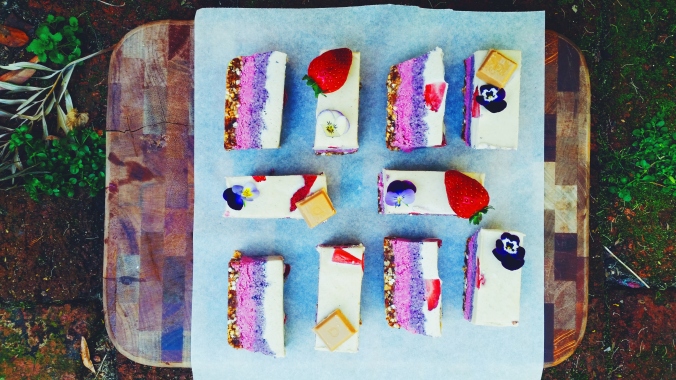
One of my favourite health food companies, Loving Earth, recently released Caramel and Salted caramel chocolate, both refined sugar free and vegan. I have been excitedly thinking up ways to use these beautiful chocolate bars. The sweet caramel chocolate matches perfectly with the tart berries and creamy vanilla.

Processed with VSCOcam with f2 preset

Mixed berry and caramel cake

Ingredients

3 cups of raw cashews, soaked overnight, rinsed

1 cup hazelnuts

1/2 cup loving earth caramelised buckinis

12 medjool dates

3/4 cup coconut oil, melted

1 cup blueberries, thawed

1 cup raspberries, thawed

1 lemon, juiced

6 tablespoons coconut cream

6 tablespoons loving earth coconut nectar

1 tablespoon loving earth acai powder

1 teaspoon vanilla bean extract

6 strawberries, quartered

Method

Place the hazelnuts in a food processor and blend until just crushed. Add the buckinis and dates and blend until combined. You may need to add 1 T water to get a sticky consistency.

Line a 30 x 15 cm tin with baking paper. Press the base mixture into the tin.

Wipe out the processor and add 1 cup of the cashews, the raspberries, 1/4 C of the coconut oil, 1/3 of the lemon juice, 2 T of the coconut cream and 1 T of the coconut nectar. Process until smooth and creamy, scraping down the sides as you go. Pour over the base and smooth the top. Place in the freezer while you do the next layer.

Add 1 cup of the cashews, the blueberries, 1/4 cup of the coconut oil, 1/3 of the lemon juice, 2 T of the coconut cream, 1 T of the coconut nectar and the acai. Process until smooth and creamy.

Remove the cake from the freezer and pour the blueberry layer over. Carefully smooth the top. Place back in the freezer.

Wipe out the processor and add the rest of the cashews, coconut oil coconut cream, coconut nectar and lemon juice long with the vanilla bean paste. Process until smooth and creamy.

Take the cake out of the freezer and place the strawberries over the other layers. Pour over the final layer, partially covering the strawberries. Make sure the top is smooth and place back in the freezer for at least 4 hours.

To serve, slice the cake in rectangles, approximately 14. Let sit in the fridge 30 minutes prior to serving. Decorate with strawberries, loving earth caramel chocolate both melted and solid and edible flowers.

Processed with VSCOcam with f2 preset

Enjoy!